Pages

Sunday, 16 November 2014

Don't be scared

Cheesecake is one of the number one dishes in Poland and for very good reason - it's delicious.  If you go searching for a Polish Cheesecake recipe, as I have done countless times over the years, you will find it's main ingredient is always listed farmer's cheese or Tvarog (or a variation of that spelling).  You cannot buy this cheese in Australia, and apparently the closest substitute is Quark, and some people have even suggested cottage cheese or a combination of cottage and philly cheese.  Given that I didn't actually know the texture Tvarog, but I did know the texture of this cheesecake (there's a Polish bakery near my family's home in Brisbane!) it's been one of those things that I've never quite gone to the lengths of making.  Enter a local Multicultural Day, that given our Polish heritage, my sister said she'd make Polish Cheesecake for and the challenge was set.

Between us we compared and read through countless recipes.  Some had a pastry base and others didn't.  We wanted the pastry base so ended up combining two separate recipes.  The main thing that was clear to us though was, if this cheesecake was going to happen we had to make our own cheese.

Eventually we settled on the tvarog/farmer's cheese recipe below, as it was the simplest and you didn't have to start the day before.  The time consuming part is slowly warming the milk, because you really have to do it slowly.  Given that the milk will curdle when you add the buttermilk and vinegar, my best suggestion is put your bottle of milk out on the bench a few hours before you're going to start this process, so it's not so cold.  We made the cheese first so we knew the yield, and have then adapted the amount in the cheesecake filling recipe to suit (it was about 2/3 of the original filling recipe).  So depending on how much cheese you make, then scale the filling amounts up or down.  With the cheese, most recipes will say to 'grind' it in your food processor so it is a little smoother.  We pulsed it for about 20 - 30 seconds and it broke it up a little.

In terms of a tin, we made it in a baking tray 20cm x 30cm, and about 4-5cm high, because it was for a shared lunch.  You could make it in a round loose-bottom tin as well.  The cook time was accurate and after an hour we turned the oven off and left it to cool in the oven over night.  The top didn't crack, which we were pleased about.  And the taste... well pretty good.  I would have added some sultanas, as that's how I prefer this cheesecake, but my sister doesn't like sultanas so it was just plain.  We also discussed that a bit of lemon/orange zest or orange peel in the mix would have been a nice touch too.  I've seen other versions with nutmeg sprinkled on the top or strips of dough laid across the top and then glazed with an egg wash, and the original filling recipe had a raspberry glaze.  Don't be scared to make your own cheese, it'll take you about 90 minutes, but is so worth it to get the taste and texture of this cheesecake correct. 

This recipe and cheesecake has been a very long time coming and now that we've made it I think it will become a favourite for many family occasions.  

Sernik (Polish Cheesecake)

Dough:
225g plain flour
125g butter, softened
125g icing sugar
2 egg yolks

  1. Combine all ingredients in a food processor and pulse a few times until it comes together.
  2. Roll it into a disc and wrap in glad wrap and refrigerate for 30 minutes.
  3. Remove from fridge and place dough between two sheets of baking paper and roll out to desired shape and thickness (less than 0.5cm thick).
  4. Pick up dough in the baking paper and place straight into tin (approx 20cm x 30cm, and 5 - 6 cm high). Remove top sheet.  Prick dough with a fork.
  5. Bake at 180C for about 20 - 25 minutes until light golden.
Filling:
6 eggs, separated
200g caster sugar
650g Tvarog (farmer's cheese - see recipe below) 
140g butter, softened
1/2 tsp baking powder
2 tbsp plain flour
  1. Beat egg yolks and sugar until light and creamy.
  2. Add cheese and butter and continue mixing until well combined and creamy.
  3. Add baking powder and flour and mix until combined.
  4. In a separate bowl, whisk/beat the egg whites to stiff peaks.
  5. Gently fold 1/3 of the egg whites into the cheese mixture.  Continue gently folding in remaining egg whites until combined.  Don't overwork the mixture.
  6. Pour the mixture over the base (see above) and smooth out the top.
  7. Bake at 180C for about 60 minutes.  The top should be a little golden.
  8. Turn off oven.  Allow cheesecake to completely cool in oven with door slightly open.
Variations: add 1/4 - 1/2 cup sultanas; add some orange peel or zest.

Tvarog (Famer's cheese)
3L full cream milk
1L buttermilk
2 tbsp white vinegar
Tvarog, as the whey was draining.
  1. Allow the milk to come to room temperature, then pour into a large saucepan and place on stove on very low heat.
  2. Slowly warm the milk to a light simmer, do not let it boil.  It's a good idea to stir it often, especially once it starts to get close to a simmer - you don't want it to burn or stick to the bottom, or to boil over.  Warming the milk can take 30 - 60 minutes depending on the ambient temperature.
  3. Once the milk is simmering, remove from heat.  Add in buttermilk and stir.  And in vinegar and stir.
  4. The mixture will immediately separate into curds and whey.  Give it a bit of a stir then set aside for 10 - 15 minutes for the curds to finish forming up.
  5. Line a colander with several layers of cheesecloth and pour in the cheese (catching the curd).  Allow to drain to desired consistency.
  6. Keeps in the fridge for 5 or so days. 

Follow us on Facebook, Instagram and Twitter @oitcfood

Monday, 20 October 2014

Look what I found

My Sunday usually begins far to early, by other people's standards, with a visit around 7am to my local farmer's markets.  Some would say that even at 7am I've missed the best of the produce.  To them I say: it's Sunday, a day of rest and that's the earliest I'm prepared to get up!  I always keep a look out for interesting and hard to get items as I wander around picking up my usual fruit, vegetables, coffee and breakfast (usually a pork bun from XO or a pain au chocolat from French Sin or both - maybe I need a market's breakfast post??).

When I was on holidays in Italy recently, zucchini flowers were available cheaply everywhere - markets and supermarkets alike.  Now back at home they are very hard to find (unless I grab them from the school garden when we have zucchinis on the go, which I haven't yet, so don't worry).  Zucchini are coming into season now, so you would think that for every stall with them, someone would think about boxing up the flowers too.  And maybe they do every week at the markets but they're all gone by my late arrival at 7am.  Today I found some, right at the back of a small stall and they were cutely still attached to the tiny zucchini.  In my head I thought I'm not going to pay more than $5 and I was in luck as they were $5, so I pounced on them!

The recipe for this batter is in my last blog post and worked out beautifully.  I only made a half batch, as I only had 6 flowers and several were quite small.  With that half batch of batter, I still used the whole egg (because what are you going to do with half an egg?) and also a few extra splashes of mineral water to loosen it up.  This batter would be suitable for any vegetables, as it's very similar to a tempura batter.  Next time I'll also put bigger pieces of mozarella inside the flower and possibly experiment with other stuffing.  This tasty dish is not an every day or even an every week food, but a once a year perhaps treat when you can find the flowers, so keep an eye out!


Follow us on Facebook, Instagram and Twitter @oitcfood

Saturday, 11 October 2014

Mucho Mangia

I've just returned from 3.5 weeks tripping around Italy, where I walked, ate, drank, walked, ate, drank, walked, ate, drank - you get the picture.  For a week I did a cooking school at Casa Gregorio.  What a magic experience that was.  From that week there are so many food ideas and recipes to share that if I don't start now I just never might.  The biggest thing I learnt is that the Australian and American versions of Italian cooking use a lot more garlic, onion and pepper than the Italians do.  So cut it back if you can and enjoy the flavours of the real ingredients in each dish!

I'll start with four traditional antipasto ideas for you.

Bruschetta di pomodoro (Tomato bruschetta)
2 - 3 vine-ripened tomatoes
pinch or two of salt
a few basil leaves, torn/shredded into small pieces
80mL (1/3 cup) extra virgin olive oil
4 slices rustic Italian bread
1 garlic clove
  1. Cut tomatoes into small pieces and place in a small bowl (the seeds too).
  2. Add a pinch of salt and the basil, then mix.
  3. Pour olive oil over the tomatoes and mix.  Allow tomatoes to sit for half an hour or so.
  4. Meanwhile, slice and lightly toast the bread.  Then rub it with a garlic clove.
  5. Spoon tomatoes onto bread slices, garnish with more basil and drizzle with remaining juice from the tomatoes.  You can allow them to sit for 10 minutes or so, which will mean the juice will start to soak into the bread.  Delicious!
 Fiori di Zucca (Zucchini flowers)
120g plain flour
1 tsp baking powder
1 tsp salt
1 egg
125mL cold sparkling mineral water
120g mozarella cheese
5 anchovy fillets, cut in half crosswise (optional)
10 zucchini flowers
Vegetable oil (for frying)
  1. In a small bowl mix dry ingredients.  Add egg and mineral water.  Gently whisk until just combined.
  2. Cut mozarella into small stick (2.5cm x 0.5cm). If using anchovies, pat them dry with paper towel.
  3. In a deep fry pan, pour in oil to a depth of 3cm and heat until batter sizzles when dropped into oil.
  4. While oil is heating, gently spread open the petals of the flower and pinch out the filaments inside.  
  5. Insert a mozarella stick and anchovy half into each flower and press/fold the petals closed.
  6. One at a time, dip flowers into batter, turning to completely coat. Let excess batter drip off.
  7. Working with a few at a time, slip battered flowers into hot oil and fry until golden brown on all sides - about 4 minutes.
  8. Using tongs or a slotted spoon transfer to paper towel lined dish to drain.  
  9. Season with salt and serve immediately.
Caprese Salad
Tomatoes (the best you can find)
Fresh Mozarella (buffalo mozarella if you can find some)
Basil leaves, torn
Salt and Pepper
Extra virgin olive oil
  1. Thickly slice tomatoes and lay on a plate. Sprinkle with some freshly cracked pepper and a little bit of salt.
  2. Thickly slice mozarella and lay a piece on top of each slice of tomato.
  3. Scatter torn basil over the top.  Drizzle with extra virgin olive oil.  
  4. Serve with balsamic vinegar as an accompaniment.


Scamorza e Prosciutto (Smoked Mozarella and Prosciutto)
Rustic Italian bread sliced
Smoked mozarella, slices or grated
Prosciutto
  1. Slice the bread into small fingers and lightly toast.  
  2. Top each bread finger with cheese then prosciutto.
  3. Place in 180C oven for 5 mins or until mozarella is melted. 


Follow us on Facebook, Instagram and Twitter @oitcfood

Tuesday, 19 August 2014

Big claims to live up to

Whilst researching (wasting time??) on Pinterest and Instagram, I see all sorts of claims of 'best ever' - chocolate cake, lamb roast, curry, salted caramel sauce, rhubarb icecream (yes, I made that one up)... the list is endless.  But really can anything ever actually claim to be the best ever? Now usually I like to think I'm a glass half-full kind of a gal, but continual claims of 'best ever' have me frowning, shaking my head and definitely becoming the glass half-empty type.  That's not to say that it's not possible, I just think that if we bandy it around far too much, it will ultimately dilute or make it meaningless.  Think about when you last heard the following terms: hero (think sporting references); awesome (I know I use it too much) or worse, totes awesome; unpack (and no I'm not referring to your suitcase or shopping); and my personal favourite - omg.

By now, if you're still reading, you're no doubt wondering why I'm carrying on about this on a food blog?  Because I can, because it annoys me and because I've now cooked 'The Best Chocolate Cake Ever', aka Anne.  It's a big cake that has a lot, and I mean a lot, of sugar in it (2 cups!), but let's just move on.  It's a really simple cake to make and you don't even need to remember to take your butter out of the fridge to soften, because you melt it.  This is a throw-it-all-in-the-bowl and beat on high for 2 minutes kind of a cake - what can be simpler!  I guess that's part of the reason it's a 'best ever' recipe.  In the versions I'd read, many bakers were saying it took a lot longer to cook than the 45 minutes of the original recipe, and I concur.  With this in mind, I used my bundt cake tin (the swirly one with the hole in the middle) as I thought that might help.  I suspect in one way it did, the cake was cooked through and didn't fall down, and in another way it didn't, as it still took 65 minutes to cook.

One thing I realised when I came to ice this cake, is that I've never actually iced a cake I'd baked in my bundt tin.  Usually with these cake I just dust with icing sugar or pour melted chocolate or a syrup over.  The biggest challenge was icing around the hole in the middle. If you're using a bundt tin, you've been warned!

It's a good and tasty cake, easy to prepare and it makes a big cake. The top of mine, which became the base because of the tin I used, was still a little soft and fudgy, I think in part because of the lower oven temperature.  I will make this cake again and this time try it with less sugar.

Do I think it's the best ever?  Only time will tell!

Best Ever Chocolate Cake
185g butter, melted
2 cups self-raising flour
2 cups white sugar (regular is fine)
4 tablespoons cocoa
4 eggs
1 cup cold water with 1/2 teaspoon bicarb soda mixed in
2 tablespoons hot water
  1. Melt butter over a low heat in a small saucepan.  Allow to cool a little.
  2. Sift flour and cocoa into mixing bowl. Add sugar give the dry ingredients a little mix with a spoon.
  3. Add  eggs and cold water, then start your mixer on medium.
  4. Add hot water, then drizzle melted butter in.
  5. Turn mixer to high and let it go for 2 minutes.
  6. Meanwhile grease and flour your tin (24cm round tin or bundt tin).  If using a normal tin, grease, flour and line base with baking paper. You could also dust with cocoa instead of flour.
  7. Pour batter into tin.  Tap on bench to release some of the air bubbles.
  8. Bake at 160C for 45 - 60 minutes.  Check after 45 minutes and rotate in oven.
  9. Cool slightly in tin, then turn onto cooling rack.
  10. Ice with chocolate icing when completely cool.
  11. Decide if it's the 'best ever' chocolate cake you've made/eaten. Discuss! 
 Original recipe from Baby Mac


Follow us on Facebook, Instagram and Twitter @oitcfood

Sunday, 17 August 2014

Bellissima

I hesitate to write this post, about the most-cooked dish in my kitchen - pizza.  Why do I hesitate?  Well, shortly I'm off to Italy for a few weeks.  Whilst there I'm spending a week at an Italian cooking school south of Rome, learning how to make pizza, pasta and other amazing Italian food properly.  I'm thinking it's probably good to document my pizza-making tips and recipe now, then see what changes in 8 weeks time!

Making your own pizza base is not difficult.  The only thing it requires is time - at least an hour.  If you don't have an hour then don't bother, just have something else for dinner and try again tomorrow. You don't have to work on it for an hour, you have to leave it alone for an hour, so the yeast can work it's magic. Whilst it is doing it's thing, why not have a glass of wine and decide what your toppings will be!  Let your creativity shine through in your toppings and whatever you dream up to add to your base.  Make it pretty or just make it tasty.  Once you've made your own dough, you'll never use store-bought bases again.

Pizza Dough
300g (2 cups) Bread/Pizza Flour (I use this one)
7g sachet dry active yeast
1 teaspoon caster sugar
1 teaspoon salt
1 tablespoon olive oil
200mL warm water (not hot)
extra flour
  1. Sift flour into a large bowl.
  2. Stir in yeast, sugar and salt.
  3. Make a well in the centre, add warm water and oil.  
  4. Bring together using a wooden spoon or your hands.  Turn onto a floured surface.
  5. Knead for 5 minutes, until the dough is smooth.  Add flour as necessary.
  6. Wash out and dry your original bowl, then lightly oil it.  
  7. Place the ball of dough into the oiled bowl and cover with glad wrap or a tea towel, and set aside in a warm place to prove for 1 hour (or until doubled in size).
  8. On a floured surface, knock back the dough and knead again until smooth.
  9. Divide the dough into two and roll out to form two thin bases.
  10. Add sauce, cheese and toppings.  Bake at 240C for 8 - 10 minutes.
Activate yeast; mix dough; let it prove.
Other ideas:
  • Make sure you have some flour on your hands before working the dough.
  • If it's a cool day, then mix the warm water with the yeast before adding to dry ingredients.
  • Some say you can use normal plain flour instead of bread/pizza flour.
  • Dough can be wrapped in gladwrap, then a snaplock bag and frozen for another time. Just thaw it in the fridge, then allow it to come to room temperature before kneading and rolling out.
  • Add fresh or dried herbs, such as oregano, thyme, basil, rosemary etc, to the dry ingredients.
  • Add a few tablespoons of dried turmeric and finely diced red chilli (or chilli flakes) to the dry ingredients. The pic on the bottom left is an 'indian dough', which I topped with tandoori chicken, coriander and some mango chutney to finish
  • Try not to have more than 3 - 4 other toppings, as well as cheese and sauce.
 
Follow us on Facebook, Instagram and Twitter @oitcfood

Sunday, 25 May 2014

Bring on the cooler weather

It's supposed to be getting cooler at this time of year, but as I write this I'm sitting in brilliant sunshine, not a skeric of breeze and it's approaching 27 degrees - very unusual for the last week of autumn in this part of Australia.  This is usually the time of year when we start thinking about and cooking up rich, hearty and comforting meals.  The kind that involve a long, slow cook and then a big bowl that you can wrap your hands around to warm them up.  So, in preparation for the winter months, that will inevitably arrive in these parts, below is a very adaptable Lamb Ragu with pasta.  Once you read through the recipe, you will realise that you can throw in whatever you like and there's no need to stick strictly to the measurements (where I've given measurements).  I've cooked this on the stove, as my saucepan's create a water seal, but you can cook this in the oven, slow cooker or pressure cooker - however you feel comfortable.

I've also included a recipe to make your own pasta too.  It's not a difficult process, but you'll need some time and a pasta machine to roll it out.  I love that my $15 pasta machine (bought from a discount department store a few years back) is still going strong! If you're keen to try making your own pasta, keep an eye out for a cheap machine next time you're at the shops. The amount of dough in this recipe will feed 8 or more people.  I'm not usually feeding that many people so once it's rested I usually divide it in half, wrap one piece in glad wrap and put it in the freezer for another day.

Lamb Ragu (serves 4)
2 lamb shanks (500 - 600g) - buy them already frenched if you can, it will save you some time
Olive oil
1 small-medium red onion, halved and slice thinly
3 - 4 garlic cloves, peeled and smashed
1/2 small red chilli, seeds removed, finely diced
1 - 2 sprigs of fresh rosemary
1/4 - 1/2 cup dry red wine
1 tin (400g) chopped tomatoes
1 cup water (or vegetable stock)
large handful of flat-leaf parsley, finely chopped
salt and pepper
Fresh pasta sheets (make your own or use torn up fresh lasagna sheets)
Parmesan cheese
  1. Heat a medium-sized heavy based saucepan over a medium-high heat.  Add a tablespoon or so of olive oil.  Place lamb shanks in pan and brown all over (2 - 3 mins per 'side').  Remove from pan and set aside.  If there's a lot of fat in the pan, drain most of it out.
  2. Add onions, garlic, chilli and rosemary and cook over medium - low for 6 - 8 minutes, until onion softens and starts to caramelise.
  3. Pour in the red wine and stir to deglaze the pan.
  4. Add the tomatoes and water, stir to combine.  Add lamb shanks back to the pan, season with salt and pepper and put the lid on.
  5. Allow to gently simmer for 3 hours, or until the meat is beginning to fall off the bones.  Turn the lamb shanks over each hour during this time.
  6. Remove the lamb shanks and allow to cool slightly.  Remove the meat from the bones and shred.
  7. Turn up the heat on the sauce and allow it to reduce to a thicker consistency.  Add the lamb back to the pan, along with parsley and stir to combine.  Season.
  8. Serve over fresh pasta, with extra chilli or chilli flakes, parsley and parmesan cheese on top.
Notes
  • Once the sauce is reducing add sliced pitted olives or roasted capsicum.
  • You can omit the red wine, and just go straight to adding the tomatoes, as this too will deglaze the pan. No need to add any extra liquid as there'll still be enough to cook the meat.
  • If cooking in oven, once you've combined everything in step 4 transfer to a casserole dish and cover with alfoil.  Cook at 150C for 3 hours, turning meat every hour.  Then continue from step 6 back in your first saucepan.
  • Left over meat sauce will freeze well.  
  • You can make this 2 - 3 days ahead of time and keep refrigerated.

Pasta
250g Pasta flour
pinch salt
1 tablespoon olive oil
2 eggs
3 egg yolks
water
  1. Place flour and salt in a medium sized bowl, and make a well in the middle.
  2. Pour oil, eggs and egg yolks into the well and mix with your hands to form a smooth dough.
  3. If it's a little dry (this depends on the size of your eggs) add some water a little bit at a time until it comes together.
  4. Roll dough on floured bench until it becomes a smooth consistency (3 - 5 minutes, depending on your flour and your strength!).
  5. Wrap dough in glad wrap and allow to rest on the bench or fridge (if the weather is warm) for 1 - 3 hours.
  6. Remove from fridge and divide into 3 - 4 portions.  (At this stage I divide in half, wrap half and freeze it.) 
  7. Working with one portion at a time (keep the others covered), roll them through your pasta machine, dusting with flour as needed, until you have long thin sheets.  Cut or tear into desired size, dust with flour and set aside.  Repeat with remaining portions.
  8. Bring a large pan of salted water to the boil and cook pasta in batches (depending on size of pan) for 2 - 3 minutes, until al dente.  Strain and serve (or keep warm whilst cooking remaining pasta).
Notes
  • Make the pasta whilst the lamb is cooking.  Lay the sheets into a container and dust each layer with flour and store in the fridge till required.
  • Thaw frozen dough in the fridge, then dust with a little flour and give a quick knead before rolling through pasta machine.

Sunday, 11 May 2014

What more could you want?

You know the saying 'a picture is worth a thousand words', well perhaps in this case it's 'a picture is worth a thousand calories'!  Well maybe not quite that many, but quite a few nonetheless.  The recipe below caught my attention through not only it's picture, also by the fact it combines several of my favourite things - cheesecake, chocolate and brownies.  It sat in my inbox for a couple of days whilst I debated what size the 'bite' should be.  The original recipe (found here) calls for the use of a mini-muffin tin and goes on to detail the amount of mixture to put in each, starting with a tablespoon of brownie mix.  It could be a lost in translation issue from using a recipe from the US, but those two details didn't match for me. I changed my mind several times and in the end used normal size muffin tins and pretty much doubled the cooking time.  The end result - an amazing chewy brownie with the extra special mouthful of cheesecake.  What more could you want?

Brownie Cheesecake Bites
Makes approx 24

Brownie mix
4 eggs
1 1/4 cups cocoa
1 teaspoon salt
1 teaspoon baking powder
3 tablespoons espresso coffee (or 1 tbsp instant if you must, mixed with 2 - 3 teaspoons boiled water)
2 teaspoons vanilla extract
2 1/4 cups caster sugar
250g unsalted butter, melted
1 1/2 cups plain flour
  1. Melt butter in a small saucepan over low heat.
  2. Combine eggs, cocoa, salt, baking powder, espresso and vanilla extract in a large bowl. It will be a very thick paste.
  3. Add sugar and melted butter, and whisk gently to combine.
  4. Stir in flour and mix till thoroughly combined, using a wooden spoon or spatula.
Cheesecake mix
250g cream cheese, softened
3 tablespoons caster sugar
1 large egg yolk
  1. Mix all ingredients until well combined.
  2. Spoon into a piping bag.  If you don't have a piping bag, just snip the corner off a snaplock or other plastic bag instead.
Assembly
  1. Line muffin tin with patty pans (or lightly grease with butter).
  2. Spoon a generous tablespoon of brownie mix into each patty pan.
  3. Pipe a generous teaspoon of cheesecake mixture on top.
  4. Add another teaspoonful of brownie mix on the top.
  5. Swirl the two together if you like.  Smooth the top. (They won't rise very much, so it's ok to fill them quite full.)
  6. Bake at 180C, for 25 - 30 minutes.  Check halfway through and rotate in the oven if necessary.  
  7. Test with a skewer or toothpick when they start to look firm enough.  The skewer should come out mostly clean and maybe with a few crumbs on it (as long as it's not liquid!).  Remember it's a brownie so you want it to be fudgy and not completely dry.
  8. Allow to cool on wire racks.  
  9. Make yourself a coffee and try not to eat them all at once!
Variations
  1. Blitz some mixed berries and add to cheesecake mix.
  2. Stir a few chocolate chips through the brownie mix.
  3. For an adult version, swap half the espresso for Kahlua or Tia Maria

Wednesday, 30 April 2014

Everybody needs good neighbours

I had a surprise visit from one of my neighbours just before dinner time yesterday.  These 'sometimes' neighbours are a lovely older couple who visit here every two months or so for about a week at a time, usually when it gets too hot or cold or boring for them at their home in Toowoomba.   When they're here we have a quick chat as we're coming and going or a cuppa in the afternoon so that they can catch up on the goss of what's been going on around here.  I often take them a jar of jam or some biccies or other things I've recently baked or cooked.  It reminds me of times gone past of dropping in on my grandparents.  Anyway, I digress.  Yesterday, they gave me a cookbook.  Not just any cookbook, rather an Australian classic - Stephanie Alexander's 'The Cook's Companion'.  They saw it a second-hand bookshop and thought I'd like it since I love to cook.  You can imagine how surprised and grateful I was.

Later on when sharing this story, a friend of mine mentioned her love for this book and to definitely look up the pork with prunes.  Now if you aren't already aware of the size of this cookbook, you may be surprised to know that this recipe doesn't appear until pages 566 - 567, and there are more than 200 pages of recipes after that.  It'll take me quite some time to get through this book, so I need your help.  If you have a copy of Stephanie Alexander's book please let me know what your favourite is and what I should be cooking next!

Pork with prunes
12 large prunes, pitted
1 1/2 cups dry white wine
2 pork fillets
flour, seasoned with salt and pepper
olive oil
butter
1 tablespoon redcurrant helly
4 tablespoons thick cream
juice of 1 lemon and zest
  1. Soak prunes in wine overnight.
  2. Cut each pork fillet on the diagonal into 6 pieces.  Flatten each piece a little with the palm of you hand, then dust each piece with seasoned flour.
  3. Strain prunes and reserve wine to make the sauce.
  4. Heat a little oil and butter in a heavy-based frying pan until butter foams. Cook pork pieces in batches until browned over moderated heat, 3 minutes per side.  Remove cooked pork and cover with foil to keep warm whilst doing the next batch.
  5. Wipe out pan with kitchen paper and reheat.  Add wine and allow it to bubble fiercely.
  6. Add redcurrant jelly and cream.  Then stir to blend.
  7. Return meat to pan and add prunes.  Lower heat a little.  Turn meat in sauce as it reduces.
  8. Add a few drops of lemon juice and adjust seasoning as necessary.  The redcurrant jelly can make it quite sweet, so make sure you taste the sauce and keep adjusting with lemon juice, salt etc.  Add some lemon zest too for a little more zing!
  9. Keep cooking until the sauce turns toffee-coloured and becomes quite thick.  If too thin, remove meat and boil more fiercely.  If too think, add a few drops of water or an extra tablespoon of wine.
  10. Spoon pork medallions onto plates, top with prunes and spoon over sauce.  Serve with green beans, crispy potatos and a beautiful glass of wine.

Friday, 25 April 2014

Chewy or crunchy?

Today is ANZAC Day.  A day when Australians and New Zealanders commemorate the sacrifice of the countless men and women who have fought and continue to fight to protect the freedom of our lands.  Across both countries the numbers of people attending Dawn Services and ANZAC Day Marches continues to grow, as we all come to realise just how horrific a sacrifice that those who went before us have made. 

There are a lot of traditions that go along with ANZAC Day, including playing Two-up, which is illegal to play on any other day of the year.  In this game the 'Spinner' places two coins (pennies if you can find them) on a wooden paddle.  The coins are tossed in the air and punters place bets on how they will land (heads, tails or odds).  There are many variations on how you win, depending on where you're playing - so check the local rules if you're having a go today!

Another tradition is ANZAC Biscuits.  These biscuits have long been associated with the Australian and New Zealand Army Corps (ANZAC).  The story goes that these biscuits were lovingly made at home and sent to the troops in the frontlines in Europe in World War 1.  They transported well and the ingredients don't spoil easily, not to mention how tasty they are.
http://www.anzacday.org.au/miscellaneous/bikkies.html

Whilst the main ingredients remain the same after almost 100 years, you'll find all sorts of variations these days, including the addition of lemon myrtle or macadamia nuts, as well as 'healthy' versions using almond meal not flour, coconut oil and apple juice instead of butter.  But seriously, don't mess with the original.  Usually the biggest point of contention is whether you like your ANZAC biscuits crunch or chewy.  For me it's chewy all the way.  If you like them crunchy, then cook them longer and leave them on the tray till fully cooled - it's as simple as that.  However you will find recipes for crunchy versions that say to increase the amount of golden syrup and/or use brown sugar instead. 

The recipe below is a tried, tested and much loved family recipe.  Happy cooking.  Lest we forget.

ANZAC Biscuits (makes approx 30)
1 cup rolled oats
3/4 cup dessicated coconut
1 cup self-raising flour
1 cup sugar

125g butter
1 - 2 tablespoons golden syrup
1 teaspoon bicarbonate soda
2 tablespoons boiling water
  1. Combine butter and syrup in a saucepan and melt over a low heat.
  2. Mix all the dry ingredients in a large bowl.
  3. Mix bicarb with boiling water, and stir into melted butter - it will froth up (see picture to the right)!
  4. Add frothy butter mixture to dry ingredients.  Combine well.
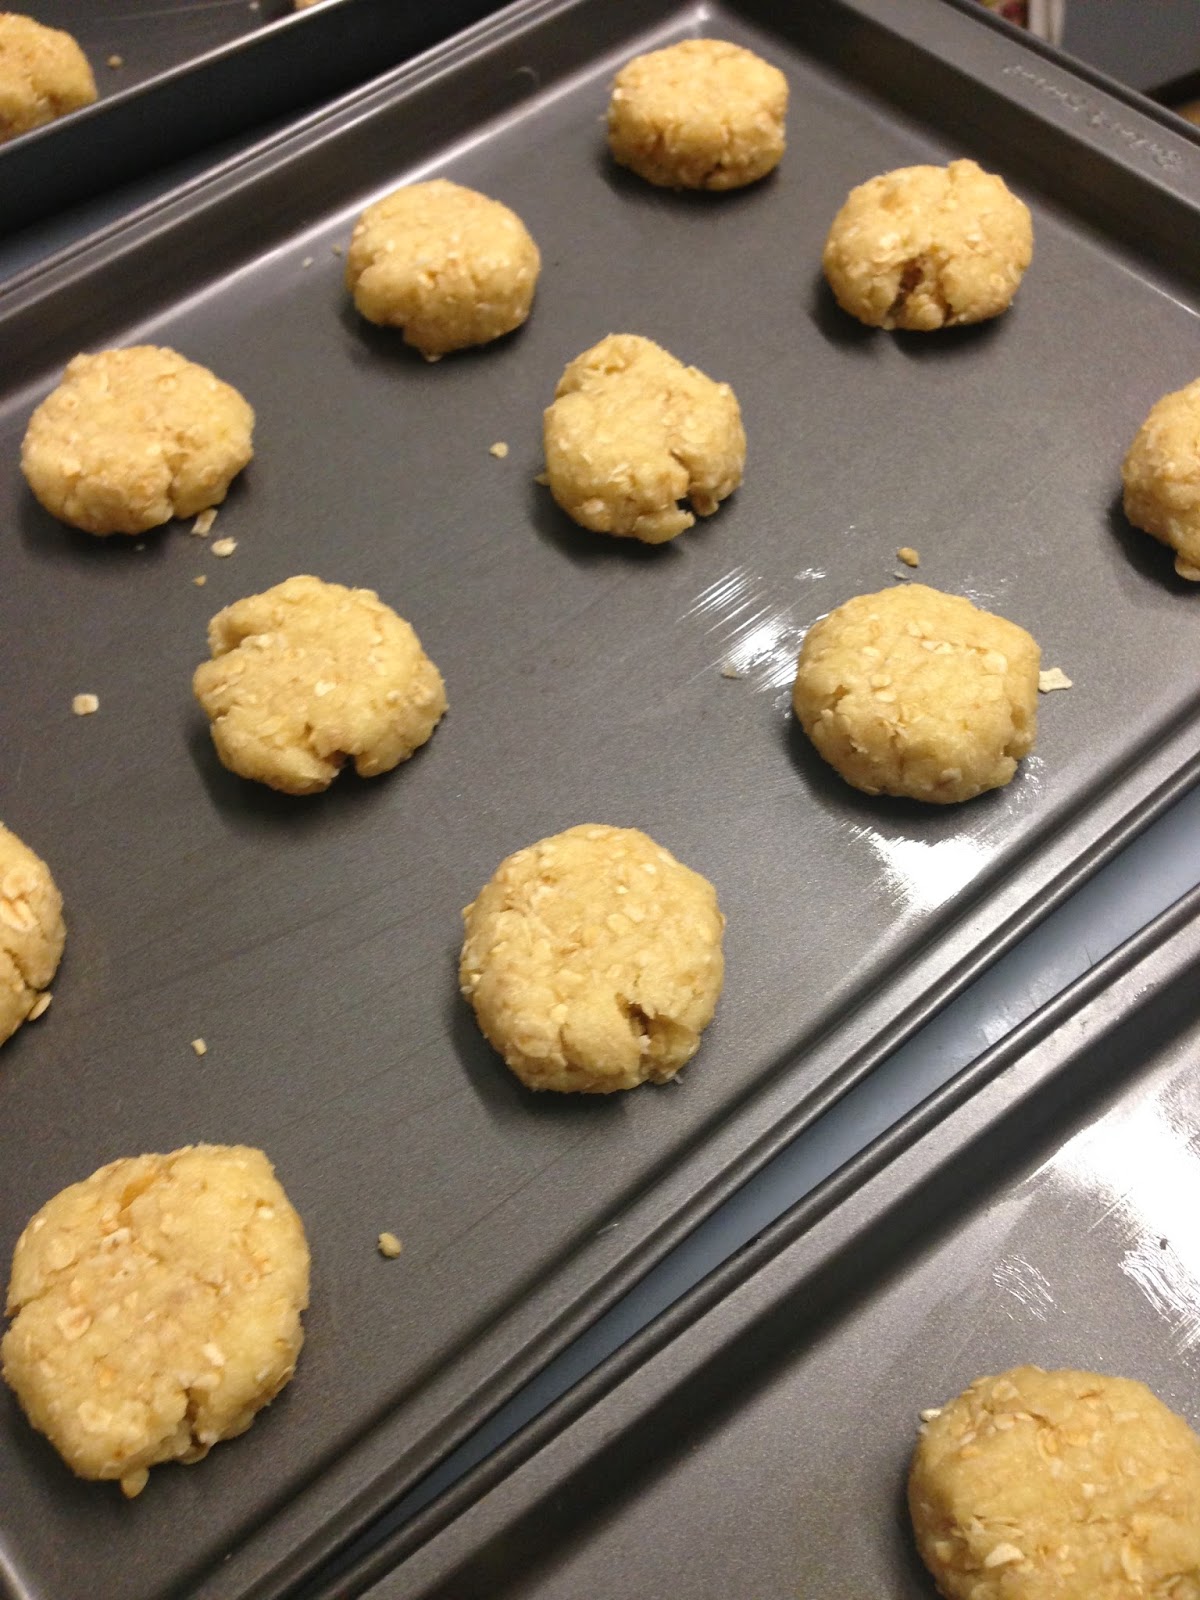
  5. Roll into balls and place onto greased oven trays.  They will spread as they cook, so leave some space between them.  Flatten each biscuit with the back of a fork.
  6. Bake at 150C for 15 - 20 minutes (depending on how you like to eat them).
  7. Loosen on trays while warm.  For chewy, leave them on the trays for about 5 minutes then move to wire racks to finish cooling.  For crunchy, leave them on the trays till cool.
Options
You can also make this into a slice.  Grease a lamington/slice tin and pour the mixture in.  Smooth the top and bake.


Thursday, 17 April 2014

Hop to it

Whilst contemplating my Easter Sunday menu for the whole family, a memory popped into my head of marshmallow bunny rabbits.  No, not the ones you buy coated in chocolate and individually wrapped in the supermarket.  Rather, the ones that people in 'the olden days' (ha!!) made.  So to google I went, to trawl through the many recipe variations.  A lot of these were from American websites and bloggers and all had corn syrup in them.  Which then lead me to try and find substitutes for corn syrup.  Many suggested that glucose syrup or golden syrup would work, but I wasn't so sure.   Eventually I found a couple of recipes that required no eggs, no candy thermometer and no corn syrup.

My next job was to find the bunny rabbit moulds.  This proved a lot easier than I expected, with a visit to my local homewares store.  There I happened to find the full range of D.Line bunny moulds - Big Daddy (750mL), Junior (125mL) and Baby (25mL).  The bonus is that these moulds are actually made in Australia and this is an Australian owned company.  It was difficult deciding on which ones to buy, but in the end I came home with 4 Juniors and 8 Babies.  Cleverly, the creators of these moulds have included four recipes on the packaging - Marshmallow Bunny, Easter Bunny Creams, Chocolate Apricot Bunnies and Jelly Bunnies.  I was pleased to see that their marshmallow recipe was pretty much the same as the one I'd finally settled on before heading to the shops, and so I actually used it instead.  In the end it was a very straight forward process, including filling all the moulds.

The recipe stated it would make about 750mL.  My mixture ended up filling all the bunny moulds I had, as well as a silicon Easter mould (small eggs and rabbit heads), which I got free at Woolworths this week, and there was still enough left to fill a small ramekin as well!  The final result was a beautiful smooth and silky marshmallow, which I'm pleased to say I've only eaten two of, so far!

Happy Easter!

Marshmallow Bunny
3 teaspoons gelatine
125mL hot water
60mL cold water
150g caster sugar
10mL vanilla essence (which I totally forgot to put in!) or other flavouring
Food colouring (if desired)
Dessicated coconut
  1. Place sugar and cold water into a large bowl (yes, use your big bowl!) and beat for 5 minutes with an electric mixer.
  2. When that time is almost up, sprinkle the gelatine over the hot water and stir briskly with a fork until dissolved.
  3. Whilst gelatine mixture is still hot, pour it into the sugar solution and beat on the highest speed for about 10 minutes (mixture should be very thick glossy white and hold a figure 8).
  4. Whilst the marshmallow is thickening, grease your moulds - just rub them with a little bit of oil and wipe most of it away with a paper towel.
  5. Add desired flavour (I forgot this step and they still taste yummy to me) and beat again.
  6. Pour into moulds and run a knife over the top to make a flat base.  Allow to set on the bench for at least an hour, then transfer to the fridge for 1 - 4 hours, depending on the size of the moulds you used.
  7. Spread a thin layer of coconut onto a large plate (this is where you'll be tipping the bunnies out shortly).
  8. When you're ready to tip them out, run the tip of a knife around the top edge of the mould and ease the marshmallow away from the sides.  Tip it over and 'encourage' it out, so that the base of the bunny lands on the coconut.
  9. Roll in coconut, or if you're going to decorate, then now's the time.  Use thin small paint brushes and tiny amounts of food colouring to paint the eyes, ears, nose etc.  Allow to dry, then roll the whole bunny in coconut.
  10. Place into an airtight container, lined with baking paper.  Refrigerate for 1 - 2 weeks (don't think they'll last that long!).
Notes
  1. To make the grass for the bunnies to sit on: put some dessicated coconut into a snap lock bag, add a few drops of green food colouring, seal and shake around.  Spread this onto your serving plate, then place the bunnies on top.
  2. To make coloured bunnies - add a drop or two of food colouring to the marshmallow mixture before pouring into moulds.  Then also roll in coconut of the same colour, if desired. 

Wednesday, 16 April 2014

GOOD OL' TOAST

Good morning all. I thought I would ease my way back into blogging by starting off easy with some good ol toast. Now, my fav is plain and simple butter on toast, but have been partial to some Vegemite or some lemon butter. Today I splurged on 4 pieces of toast and decided to go 4 ways. Butter, Strawberry Jam, Lemon Butter and Vegemite.
The recipe requires limited ingredients:

  • Bread (sliced into even pieces, you may use white, wholemeal, multigrain or any type of bread you wish).


  • Butter or Marg
  • Conserve of your choice
  • Vegemite
  • Lemon Butter (thanks Mum)


you will also need a toaster or griller

Step 1: Place bread into toaster and push the lever down, wait......
Step 2: Take the toast out of the toaster.
Step 3: Place on bread board and butter the piece of toast and spread whatever topping you want on it.
Step 4: Enjoy. (you may want a strong coffee to go with it (I ran out of milk)


Tuesday, 15 April 2014

Sweet, sweet chilli

I don't know about you, but sweet chilli sauce has to be about the best and most versatile sauce ever.  You can mix it with soy sauce, kecap manis and lime juice to make a wicked dipping sauce for spring rolls, dumplings or wontons.  You can drizzle it over pan-fried haloumi or add a good splash to your mince when you are making meatballs or hamburger patties or bolognese sauce.  I've even been known to add it to those big cheesy dips, you know the ones that are basically a heart-attack in a hollowed-out cob loaf, sooooo good!  There's a million things you can add it to and eat it with.  But have you ever thought about making your own?  If yes, then this is your lucky day. If no, then why not?  It's so easy and guess what, this is your lucky day!

There are many variations on the basic sweet chilli sauce recipe.  The best and most straight-forward version I've found is the one I picked up at The Spirit House Cooking School.  It's a fantastic balance of the spicy (chilli), sweet (sugar), sour (vinegar) and salty flavours. The recipe below is a tripled quantity version of theirs, so you have plenty for you and plenty to share.  If you just want to whip up a batch for dinner, then I'll leave you to divide everything by three.

Spirit House Sweet Chilli Sauce
3 cups white sugar
1.5 cups coconut vinegar (or rice vinegar if you can't get coconut vinegar)
1.5 cups water
6 large or 10 medium red chillies
6 cloves garlic
2 - 4 coriander root (optional)
1.5 teaspoons rock/sea salt
  1. In a large saucepan combine sugar, vinegar and water.  Bring to the boil, stirring occasionally.
  2. Whilst that is coming to the boil, slice chillies in half and deseed half of each chilli (unless you really want it to be HOT!).  Roughly chop the chillies.
  3. Peel and roughly chop the garlic.  Clean the coriander root.
  4. In a mortar and pestle pound the chilli, garlic, coriander root and salt, to a rough paste.  It will be quite juicy.
  5. Add the chilli paste and all the juice to the saucepan and continue to simmer over a medium heat for about 45 minutes, stirring occasionally.  
  6. You'll know it's getting close to being ready when it starts to become foamy on top.  At this point drizzle a bit of the sauce on a cold plate, wait for it to cool, then run your finger through it (and taste it!). The sauce on either side of the spot where your finger went should hold it's place.
  7. Remove from heat and allow to cool for 10 - 15 minutes. The sauce thickens as it cools.
  8. Pour into sterilised jars and seal. Or serve with whatever you're about to eat!
Notes
  1. I suggest chopping the chilli first, so that by the time you've washed your hands then dealt with the garlic and coriander root you have less chance of chilli still being all over your hands!
  2. If you cook it longer till it thickens more in the pan, then you've made sweet chilli jam, which is just as tasty!
  3. This recipe yields approximately 500mL of sauce.

Thursday, 27 February 2014

It's not that difficult - really!

I came across a recipe recently for a deconstructed beef wellington.  To my mind a beef wellington is a juicy piece of beef, smothered in pate or mustard then rolled up in pastry and baked in the oven.  This recipe is not that, it's much easier.  The problem with cooking a traditional beef wellington is knowing how to sear and then bake/roast the beef fillet, so that your pastry doesn't go soggy and interesting shade of pink when you cut it to serve?  I'm sure we've all had the experience of searing a beautiful piece of rib fillet, pork fillet or lamb rack before putting it in the oven to finish off, and it not being quite as cooked as we think it is.  Knowing when to stop searing is the key! 

I've learnt, from my Mum, how to cook a roast on the stove top.  Mum's process involves searing your piece of beef at a relatively high heat for 10 minutes on each side (check where your smoke alarm is before you start this!), then turning the heat down, creating a water seal with the lid on the pot and leaving for the required time according to the weight of the meat.  The result is a tender, moist and juicy roast. The burnt bits soften to make an amazing gravy. And you don't have to clean the oven afterwards!  Cooking roasts this way has set me up well to not be afraid to seal a fillet of beef or pork or lamb for say a minute longer than others might.  Yes, sometimes there's burnt bits, but I'm ok with that and you should be too. Make sure you let it rest too and cover it to keep it warm.

This beef wellington recipe is a bit different, in that there's no pate or mustard, instead a creamy mushroom, thyme and blue cheese sauce.  It's a luxurious sauce which matches well with the open tart, beef and green beans.  Despite the number of steps below, it's fairly straightforward - cook the pastry, make the sauce, cook the beef and let rest, assemble and serve.  You don't have to use exact measurements in the sauce, just go with what tastes best!

Deconstructed Beef Wellington with creamy mushroom, thyme and blue cheese sauce


1 sheet frozen puff pastry, thawed
2 Eye fillet/porterhouse steaks
Salt and pepper
Green beans
200 - 250 g (2 - 3 large handfuls) spinach or baby spinach
Sauce
1 tablespoon butter
1 small onion or 2 golden shallot, diced
250g - 500g mixed mushrooms, sliced (peeled too if you like)
2 - 3 cloves of garlic, crushed.
fresh thyme leaves
a splash (maybe 1/4 cup) hot water or white wine (you could use vegetable stock, but the sauce will be salty enough from the cheese)
150 - 150mL cream (may be more, depending on how many mushrooms you used)
blue vein cheese (as little or as much as you want/can stand)
  1. Thaw puff pastry and cut sheet into four squares.  Lightly score a border 1cm in from the each of each square.  Prick the centre with a fork.  Place on a baking tray and bake for 10 - 15 minutes at 200 - 220C, until golden brown.  Set aside to cool (or cook closer to meat being ready and serve warm).
  2. Sauce: Add the butter to a shallow wide pan (ie small fry pan) over a medium heat.  Add diced onion and sliced mushroom.  Allow to cook slowly (10 - 15 mins), until the mushrooms start to soften and caramelise.
  3. Whilst you wait for the mushrooms, season the beef with salt and pepper and place in a hot pan.  Cook for 3-4 minutes each side, depending on the thickness of the steak and how you like it cooked.  Then remove the pan from heat and put the lid on the pan (or cover pan with alfoil) to let it finish cooking and then rest. 
  4. Back to the sauce: Once the mushrooms start to caramelise, add crushed garlic and thyme leaves (pick the leaves off the stalks) and cook for 1 - 2 minutes.  
  5. Deglaze the sauce pan by pouring in the liquid of your choice (vege stock, hot water or white wine) and stir to loosen the crunchy bits on the bottom of the pan.
  6. Add the cream and crumble in the cheese, and cook slowly till the cheese is melted and the sauce thickens a little.
  7. Whilst the sauce is cooking, blanch your beans for 2-3 minutes in boiling water, drain and set aside.  Blanch spinach in same water until wilted, then drain and squeeze out as much water as possible.
  8. Once steak has rested, slice diagonally.
  9. Assembly: place spinach on top of pastry, then beef slices, then mushroom sauce on top.  Beans on the side, with more sauce.  Crumble more blue cheese over the top and garnish with extra thyme.

Thursday, 16 January 2014

It's a bit rich

Did you know that 2013 was the International Year of Quinoa, as designated by the UN, to recognise the long held practices of the Andean people who have been harvesting and eating quinoa for thousands of years. The Incas called it the mother of all grains. Quinoa was definitely the 'next big thing' in 2013, and I admit I tried it out in a few savoury things, mostly salads, and I wasn't overly impressed.  Let's be honest, it's just another grain, which is gluten free and high in protein, fibre, magnesium and iron - we could all do with plenty of that. However, because it's a so-called superfood we pay a premium for it.  People in the traditional South American quinoa growing areas are now starting to worry about food security, because the crop price has gone up (as it naturally would, when big markets get involved) and this inflated/higher price is making it harder for people to purchase it in these poorer areas.

I get a bit skeptical when people (media!) talk about superfoods.  Aren't they just the things our parents/grandparents told/made us eat because they're good for us - vegetables (broccoli, sweet potato, avocado, beans, tomato, chilli, garlic, ginger), grains (brown rice, oats), fruits (apples, bananas, blueberries), yoghurt, nuts, fish.  Then along comes goji and acai berries, chia seeds, pearl barley, kale, quinoa, green tea, green smoothies, coconut water, need I go on? Most of these have been around for a long, long time - thousands of years in many cases.  I think it can only be a good thing that people are going back to less processed and less packaged foods, and embracing the natural foods that have been around for thousands of years.  The next step is to source it locally and support local farmers and businesses. For example, why buy garlic that has been shipped to Australia from China, that has probably been stored/frozen for who knows how long by your friendly Coles supermarket, when you can get it at the local fruit shop or farmer's market where it's been harvested in the last week?

Right, so off my high horse now and onto the, you guessed it, Quinoa recipe.  I hadn't thought of using quinoa in a sweet dish until earlier this week when a friend of mine bought a chocolate quinoa cake to lunch.  It was rich and tasty and several of us wanted the recipe.  Much googling and pinteresting brought me to the recipe below.  In my search I was also looking for a recipe with mostly normal ingredients too.  So what you see below is the normal version and in brackets after some ingredients are the interesting substitutes you could make if you could find them or were so inclined!

Rich Chocolate Quinoa Cake
2/3 cup quinoa
1 1/3 cup water
1/3 cup milk (or buttermilk)
2 large eggs
4 large eggwhites
1 teaspoon vanilla extract
3/4 cup olive/vegetable oil/butter (or coconut oil)
1 1/2 cups caster sugar (or coconut sugar)
1 cup cocoa powder
1 1/2 teaspoon baking powder
1/2 teaspoon bicarbonate of soda
1/2 teaspoon salt
  1. Preheat oven to 180C.
  2. Rinse the quinoa, then add it to a small saucepan with the water.  Usually you use double the water to the amount of quinoa.  Bring it to the boil, then reduce heat and simmer with lid on for 10 - 12 minutes, until the water is absorbed.  Once cooked, leave it with the lid on for another 5 - 10 minutes, before fluffing it up with a fork and allowing to cool (i.e. tip it out onto a plate).
  3. Whilst the quinoa is cooking prepare the cake tin.  I used a bundt tin, as it's a heavyish cake and I wanted to make sure it was cooked through.  So grease the tin, then flour it.  You could also use cocoa instead of the flour, or line the tin (if it's a normal shape) with baking paper.
  4. If you're using butter or coconut oil, melt it and allow to cool.
  5. In a blender add milk, eggs, eggwhites and vanilla. Pulse for a few seconds.
  6. To the blender add 2 cups of cooled cooked quinoa and the oil. I found that the quinoa I'd made was just over two cups, so I used it all.  Blend until smooth.  Be warned, this mixture doesn't look that flash, but it's ok!
  7. In a large bowl mix the dry ingredients (sugar, cocoa, baking powder, bicarb and salt).
  8. Add the wet mixture to the dry mixture and stir to combine.  Mix well.
  9. Pour into tin and bake for 45 - 50 minutes, or until it is cooked (test with a skewer - it should come out clean).
  10. Allow to cool in tin.  Do not attempt to tip it out while hot/warm as it will most likely fall apart!
  11. Serve dusted with icing sugar, with berry coulis and a dollop of cream.